Revision work sits at the intersection of artistry and troubleshooting. By the time someone books a consultation for lip filler correction, they are usually carrying more than product in their lips. They bring disappointment, a stack of selfies taken in unflattering bathroom lighting, and often a gnawing worry that more injections will make things worse. Done correctly, revision can return softness, balance, and trust. It requires patience, anatomy fluency, a steady hand, and a willingness to say no when the safest path is to dissolve and reset rather than keep chasing a quick fix.
This guide translates years of practical experience into a clear roadmap. It covers why lumps, migration, and asymmetry happen, how to diagnose the problem under the skin, and when to use hyaluronidase versus conservative techniques to salvage good results. It also touches on advanced lip shaping approaches, from Russian lip filler to subtle hydrating lip injections, and how those choices play into long-term outcomes.
Where things go wrong: a quick anatomy and technique reality check
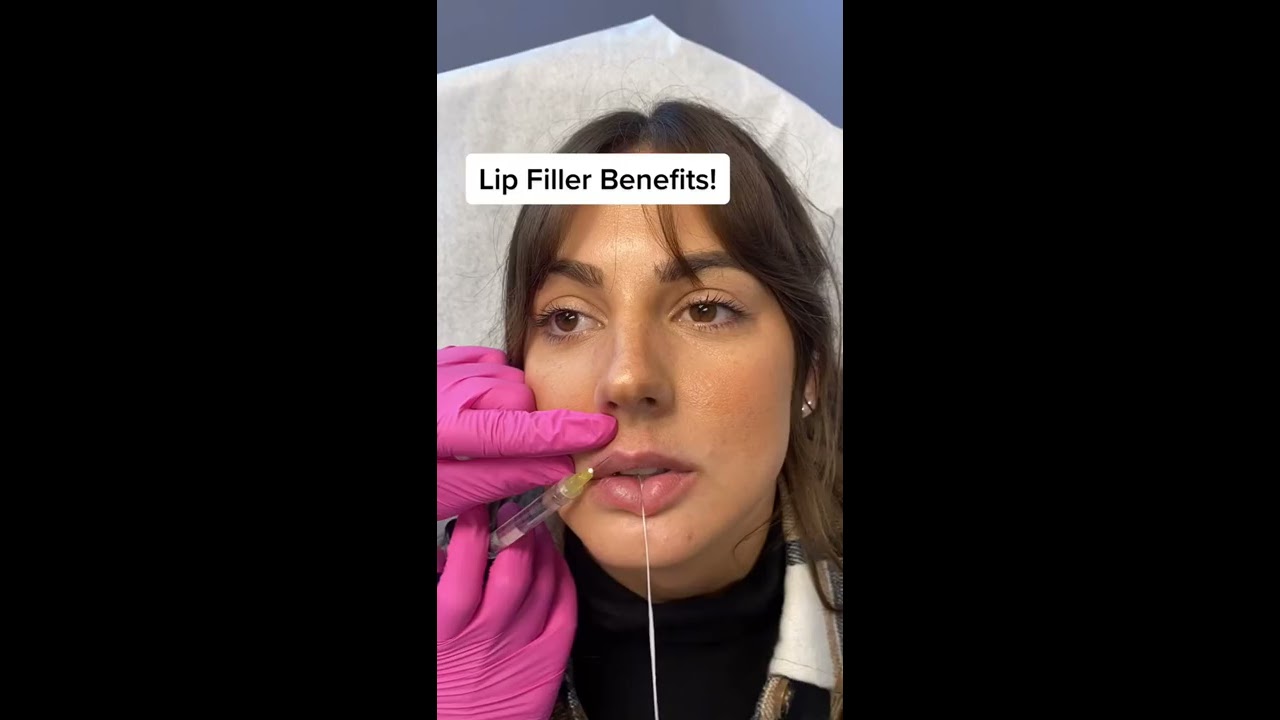
The lips are mobile, vascular, and layered. The vermillion body, vermillion border, white roll, philtral columns, and Cupid’s bow all respond differently to volume and pressure. HA lip filler sits best in pliable, well-vascularized tissue that moves with speech and smiling. When injections stray too superficial or drift beyond the lip’s boundaries, you see telltale issues: beads in the superficial submucosa, the pillow-like shelf near the white roll, or the sausage-like ridges at the commissures.
Technique matters as much as product. Needle versus cannula, retrograde threading versus micro-boluses, and respect for the wet-dry border all influence how lip injectables integrate. Overfilling the upper lip compared with the lower can flip lip proportions and pull attention to asymmetry that existed long before filler. Even excellent technique can struggle against scar tissue from prior lip augmentation injections, dental occlusion patterns, or a strong orbicularis oris that pushes product out of the ideal plane.
To add one more variable, lifestyle plays a role. Strenuous exercise within the first 24 hours, dental work soon after lip enhancement, or habitual lip pressing can encourage early migration. None of these doom a result, but they stack the deck.
Lumps: what they are and how to tell one from another
Not all bumps are created equal. “Lumps” after lip filler usually fall into three categories: superficial filler irregularities, inflammatory nodules, and true granulomas. A fourth category, vascular compromise, must always be ruled out when pain and discoloration appear.
Superficial filler irregularities feel like small, mobile beads under the mucosa. They are often painless, appear within days, and soften over two to six weeks as hyaluronic acid binds water and integrates. Many resolve with time, massage, and hydration. When I palpate, I check for mobility, tenderness, and whether the bump feels like a soft gel pearl versus a firm marble. If the tissue is not red or hot and the patient’s lip looks otherwise healthy, I tend to wait unless the bead is sitting at the lip border where it can cast a shadow on high-resolution selfies.
Inflammatory nodules show up later, often weeks to months out. They feel firmer and may wax and wane with stress or illness. They are frequently a body response to product structure, biofilm, or repeated micro-trauma from prior sessions. Granulomas are rare with modern HA lip filler, but they do happen. They feel firm, can tether tissue, and may require staged treatment with lip filler dissolving plus targeted anti-inflammatory measures. A good history helps: product brand, date, any infections, dental cleanings, or procedures since the lip filler session.
When in doubt, I use gentle pressure mapping and sometimes ultrasound in complex cases. Ultrasound can show where the lip augmentation filler sits and whether it has migrated into the superficial plane or rolled beyond the vermillion border. It also helps me plan hyaluronidase treatments with precision, minimizing FL lip enhancement the chance of over-dissolving needed structure.
Migration: the shelf, the mustache shadow, and what causes it
Migration is rarely about filler “traveling” on its own. It is usually product placed too superficially or injected near the lip border then pushed upward by muscle movement. The classic look is a puffy ridge above the vermillion border, blurring the white roll and drawing light in a way that reads as a lip mustache in photos.
I see migration more often with large volumes delivered quickly, frequent top-ups before the previous filler has settled, or when someone tries to create lip border enhancement without respecting the natural boundary between vermillion and cutaneous lip. High G’ fillers can hold shape beautifully in the right plane but will announce themselves at the surface if placed too close to the skin.
Sometimes the “migration” is not filler at all. Chronic swelling from irritation, dental malocclusion, or dermatitis around the upper lip can mimic it. A careful look under magnification and a cotton-tip roll test can clarify. True filler migration usually feels linear and sits like a ribbon along the border or just above it.
Asymmetry: pre-existing, created, and amplified
Faces are asymmetric. Teeth, bite, philtral columns, and one side’s stronger orbicularis oris create natural differences. Lip filler can either camouflage these, amplify them, or draw attention to them with a straight line that crosses a curved foundation. The most common pattern I correct is a strong left philtral column and a flat right one, which pulls Cupid’s bow off center. Another is an upper left vermillion that naturally curves inward, making the left filter segment look shorter. If you add equal volume to both sides, you risk making the discrepancy louder.
Good lip contouring in a revision case leans into micro-calibration: micro-droplet lip filler placed in tenths of a milliliter, angled to support anemic areas, and avoiding overcorrection of the full side. For some clients, a strategic lip flip alternative using a small amount of neurotoxin to relax the upper lip can restore balance without adding volume. That choice depends on tooth show at rest, a gummy smile tendency, and whether the goal is lip volume enhancement or simply more even shape.
The consultation that actually solves problems
I allot more time for revision consults. Photos with neutral and expressive views help: at rest, slight smile, full smile, pucker, and three-quarter angles. I ask about the lip filler brand, how much was injected, where it was placed, and how prior healing went. I also check for a history of cold sores, which can complicate recovery.
In the exam chair, I map by palpation. I mark beads, cords, and borders with a removable skin pencil. If there is a clear shelf or cord of product outside the vermillion border, we discuss lip filler removal with hyaluronidase. When the issue is one or two beads that are cosmetically obvious, very conservative lip filler touch-up or micro-dissolving may be enough.
I always set expectations about timelines. True correction often takes staged sessions: dissolve, heal, then re-volumize with subtle lip filler. The lips need time to calm and reset their natural envelope, especially after heavy lip augmentation.
Hyaluronidase: friend, not foe
Hyaluronidase breaks down HA lip filler. Used precisely, it is the fastest route to undo Orlando, FL lip filler lumps and migration. Many patients fear it will erase all filler or eat their collagen. In practice, hyaluronidase acts on hyaluronic acid, not collagen, and its effects are local and time-limited. Your body replaces native HA quickly. The bigger risk is dissolving too aggressively and leaving the lips deflated or wrinkled for a couple of weeks. That is why dosing and placement matter.
For a small lump, I use a micro-dose directly into the bead, wait a few minutes, and massage gently. If the filler is near the vermillion border with a shelf, I place small aliquots along the ridge, then recheck after 48 to 72 hours. For extensive migration, staged sessions minimize shock to the tissue and help prevent overcorrection and rippling.
Patients who have had allergic reactions to bee stings or hyaluronidase in the past need extra caution. A patch test can be considered. Also, if the original product is not HA, dissolving will not work. Some older or non-HA lip injectables require surgical options or prolonged observation, another reason that knowing the original lip filler options and brands matters.
When to salvage and when to reset
Not every problem requires a full dissolve. A thin shelf at the lip border that only shows in harsh lighting might respond to a micro-droplet of soft HA to blend the step-off, combined with light massage and time. A single bead can be needled, flattened, or spot-dissolved. However, if you see structural issues like deep migration, stacked product from multiple lip filler sessions, or a lip that looks swollen even at rest months later, a reset is kinder in the long run.
Salvage attempts carry the risk of chasing. Each top-up masks the previous imbalance only to reveal another. Resetting with lip filler dissolving allows you to rebuild with clarity, using natural lip filler strategies, hydrating lip injections for texture, and focused lip shaping rather than bulk volume.
The art of rebuilding after dissolving
Once the lips have been cleared and the tissue is calm, reconstruction can be a pleasure. I tend to start with a low-viscosity HA in the vermillion body for lip hydration and smoothing, then use a slightly firmer gel for Cupid’s bow filler and vermillion border filler if definition is lacking. Micro-boluses of 0.01 to 0.03 ml create control. I reassess after each tiny deposit, checking how the lip moves with speech.
The Russian lip technique or Korean lip filler styles can be appropriate in selected cases, but they are not one-size-fits-all. Russian lip shaping seeks vertical projection and a distinct Cupid’s bow while keeping the sides slim, often with vertical threads. It can look stunning on straight profiles with good philtral support, but on tight or thin skin it risks stiffness. The keyhole lips technique, popularized on social media, uses a central highlight and careful shadow play. It can be done subtly, but it demands a light touch. For most revisions, I prioritize pliability and balanced lip filler over trend-driven shapes.
Clients with smoker lines benefit from perioral filler placed just outside the vermillion, in micro-droplets, to soften vertical lip lines. Anti-wrinkle lip filler is a misnomer, but lower G’ HA combined with tiny doses of neurotoxin in the upper white lip can reduce pursing without compromising function. For mature lips, a lip rejuvenation plan that includes lip border enhancement for structure, lip smoothing injections for texture, and cautious lip volume enhancement works better than one heavy session.
Pain, swelling, bruising, and realistic downtime
Revision is usually easier to tolerate than people fear. With topical anesthetic, vibration distraction, and ice, lip filler injections feel like brief stings. Pain levels sit around a 3 to 5 out of 10 for most. Swelling peaks at 24 to 48 hours. Bruising varies based on vascularity and technique, but micro-droplet lip filler and slow injection reduce risk. If hyaluronidase is used, there can be transient deflation for a week, then a return to baseline as native hydration rebounds.
I encourage patients to plan their schedule around the first 72 hours. Most are presentable within two to three days and camera-ready within a week. If you have a public event, give yourself at least 10 to 14 days. Cold sores can flare after lip procedures, so anyone with a history gets prophylaxis.
Aftercare that actually works
The lips are small, but their aftercare matters. Keep them clean, use bland ointment for a day if there are needle entries, and avoid lipstick the first 24 hours. Skip strenuous workouts and saunas for a day. Sleep with your head slightly elevated the first night. Do not massage unless instructed, and if you are told to massage a bead, use clean hands and gentle, brief pressure.
Hydration helps the HA matrix. Salt-heavy meals can add to swelling early on, so moderation is wise. Dental work and facial massages are best postponed for about a week. Photo updates at day 2 to 3 and day 7 help me catch any developing issues quickly.
Long-term maintenance without overfilling
HA lip filler is temporary. Most clients enjoy their results for 6 to 12 months. Longevity depends on product, metabolism, and how much movement the lips see. Athletes and expressive talkers sometimes metabolize faster. The most reliable plan is light lip filler maintenance with small top-ups rather than large, infrequent boluses. This preserves softness and reduces the risk of cumulative migration.
Resist the urge to build volume at every visit. Ask whether the shape still flatters your face from multiple angles: straight on, 45 degrees, and profile. Sometimes the best choice is a hydrating lip filler refresh for smoothness rather than more size. Trust an injector who occasionally suggests waiting another month before topping up.
Choosing the right product and technique for your lips
HA families vary in crosslinking and cohesivity. For the lip body, I favor an HA with moderate flexibility that integrates smoothly. For the vermillion border and Cupid’s bow, a touch more structure can define without stiffness. Brands evolve, and different regions carry different lines, so I focus on qualities: a filler that does not clump, tracks well with movement, and allows precise placement in small aliquots.
Needle versus cannula is not a binary. I often blend both. Needles offer accuracy in the Cupid’s bow and philtral columns, while a small cannula can reduce bruising for lateral lips. The lip mapping should reflect each person’s anatomy rather than a fixed pattern. Look for an injector who draws a plan on your lips and explains the why behind each point.
Cost, value, and when to walk away
Revision often costs more than a standard lip filler session. You are paying for analysis, potential lip filler dissolving, staged visits, and careful sculpting. Prices vary widely by region. A correction plan might involve one to two dissolving visits and one or two rebuilding sessions, spaced a few weeks apart. While the sticker shock can feel uncomfortable, think about value over the year. Lips you love every day are worth more than cycling through disappointment and quick fixes.
Sometimes the best value is a decision not to inject. If someone arrives with excessive scar tissue, heavy product that is not HA, or unrealistic goals like doubling lip size on a narrow dental base, I explain the limits openly. Ethical restraint protects both outcomes and relationships.
Special cases worth flagging
First-time lip filler patients who arrive for a “touch-up” after an unsatisfying first attempt often need a reset. The second session can be magical if we rebuild with subtle lip enhancement targeted to their proportions. They also benefit from understanding that swelling from the first lip filler before and after photos may have set unrealistic expectations.
For thin lips with tight skin, less is more. Gentle lip plumping injections over time, focused on structure and hydration, avoid the ducky look. In patients over 45, collagen decline and elastin changes mean that perioral support often matters more than raw lip volume.
Patients who request needle-free lip filler should know that hyaluron pens are not medical devices and can cause uneven distribution, bruising, and infection. If needle fear is the barrier, strong topical anesthetic and a calm pace can transform the experience safely.
A simple decision path you can use
- If you see a ridge above the vermillion border months after treatment, consider migration and discuss targeted lip filler hyaluronidase. If you feel soft, mobile beads that do not hurt and you are early in healing, consider watchful waiting for two to four weeks, then reassess. If asymmetry worsened with previous filler, request a plan that prioritizes structure and micro-volumes rather than equal amounts on both sides. If you have repeated lumps or inflammation, ask about ultrasound-guided correction and a switch to a different HA profile. If your lips look stiff or shelf-like in profile, consider dissolving and rebuilding with subtle lip filler flexibility rather than stacking more product.
Before and after: what honest progress looks like
Realistic lip filler before and after comparisons show lips at rest with consistent lighting and angles, plus a slight smile view to confirm function. In revision cases, the most gratifying changes are often in motion. The lip edges soften, whistles stop, lipstick sits without bleeding, and the border reads crisp rather than swollen. In numbers, that might be 0.5 to 1.0 ml over one or two sessions after dissolving, not 2 to 3 ml in a single visit. Patient comments tend to shift from “My lips look bigger” to “My mouth looks like mine again.”
Final thoughts from the injector’s chair
Correction is a collaboration. The best results happen when the patient embraces a staged approach, the injector respects anatomy and restraint, and both are willing to let the lips breathe between steps. Natural-looking lip filler is not a brand promise, it is a philosophy. It favors balance over maximal volume, shape over trend, and long-term tissue health over short-term social media impact.
If your current lips show lumps, migration, or asymmetry, there is almost always a path back to soft, balanced, and confident. Start with a thoughtful lip filler consultation. Ask to see examples of lip filler correction, not just primary lip augmentation. Discuss lip filler options and technique, not just milliliters and price. And remember that the safest, most beautiful lips often come from doing a little less, with a lot more intention.
📍 Location: Orlando, FL
📞 Phone: +16892839717
🌐 Follow us: